This is a tutorial on how to deploy a machine learning model using Django, by first training the model, save the trained model and then deploy it using Django. The deployed model will then predict new instances of inputs from users. After prediction based on the user input, the received user input and the predicted outcome will be saved into the project database. The model to be deployed was trained on the famous (Fisher’s or Anderson’s) iris data which has four features namely sepal length and width and petal length and width measured in centimeters and a label named species which has three iris species (categories), namely Iris setosa, versicolor, and virginica. Since this tutorial is about how to deploy a machine learning model, instead of giving a detailed explanation of the model, I will only give the lines of code used to train the mode and a heading describing the functions of the code.
Lines of Code Used To Train The Model
packages needed for performing the analysis
from sklearn.model_selection import train_test_split
from sklearn.datasets import load_iris
from xgboost import XGBClassifier
from sklearn.metrics import roc_auc_score,roc_curve,accuracy_score,confusion_matrix
import pandas as pd
import numpy as np
from sklearn.preprocessing import StandardScaler
import matplotlib.pyplot as plt
import seaborn as sns
import joblib
import os
from pandas.api.types import is_string_dtype, is_numeric_dtype,is_categorical_dtype
%matplotlib inline
Loading the iris data and scaling the input variables
iris_data=load_iris()
scalar=StandardScaler()
iris_feat=scalar.fit_transform(iris_data.data)
Splitting the dataset into training and testing sets
X_train, X_test, y_train, y_test = train_test_split( iris_data.data, iris_data.target,
                                             test_size=0.33, random_state=42)
Training the model
xgbd=XGBClassifier(n_estimators=100,criterion='entropy', max_delta_step=6,
                     min_samples_split=45,colsample_bytree=.4,max_depth=13,
                     gama=10,max_features=11,min_child_weight=.4)
xgbd.fit(X_train,y_train)
Testing the model on the test data
y_predict  = xgbd.predict(X_test)
accuracy_score(y_test,y_predict)
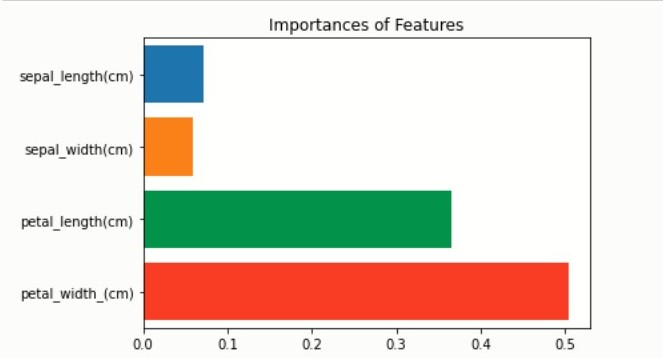
Determining the impact of each variable on the prediction of the species
# converting the data into a  data frame
features=pd.DataFrame(iris_data.data,columns=iris_data.feature_names)

# RENAMING THE FEACTURES
features.rename(columns={"sepal length (cm)":"sepal_length(cm)","sepal width (cm)":"sepal_width(cm)",
                         "petal length (cm)":"petal_length(cm)","petal width (cm)":"petal_width_(cm)"
},inplace=True)
features_impt=pd.Series(xgbd.feature_importances_,index=features.columns)
plt.title('Importances of Features')
sns.barplot(x=fea,y=features_impt.index)
plt.show()
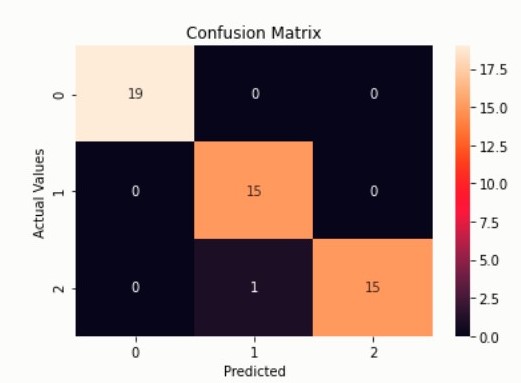
Creating a Confusion Matrix
conf_mat = confusion_matrix(y_test,y_predict)
ax=plt.subplot()
sns.heatmap(conf_mat,annot=True,ax=ax)
ax.set_xlabel('Predicted')
ax.set_ylabel('Actual Values')
ax.set_title('Confusion Matrix')
Saving the trained model
# create a directory named models
os.makedirs('models')
# SAVE THE MODEL
joblib.dump(xgbd,'models/iris_model.pkl')
Example of how to load a saved model
# loading the saved model
model=joblib.load('models/iris_model.pkl')
model
After training and saving the model, we will now deploy the trained model to predict new species of iris based on users inputs using Django framework.
The Django Project (ml_django project)
A project is a collection of configuration which can contain multiple apps. Before creating the Django project which will be named ml_django, we need to first install Django, so from the command line run:
$ pip install Django
After installing Django, cd (change directory) into a directory where you’d like to store your project and run the following command:
$ django-admin startproject ml_django
to create the ml_django project in your current directory. Since the ml_django project has been created let’s look at what the ml_django project contains
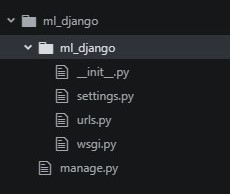
The files are:
-
The outer ml_django/ root directory is just a container for the project.
-
manage.py is a command-line utility that lets you interact with the ml_django project.
-
The inner ml_django/ directory is the actual Python package for the project.
-
ml_django/init.py is an empty file that tells Python to treat ml_django directory as a Python module
-
ml_django/settings.py: is the main configuration file for the ml_django project containing initial default settings.
-
ml_django/urls.py is the URL declarations for the ml_django project. Each URL defined here is mapped to a view and it tells the project how to handle each view.
-
ml_django/wsgi.py is an entry-point for WSGI-compatible web servers to serve your project.
The development server
Change into the outer ml_django directory and start the development server by running the following command:
$ python manage.py runserver
After running the command, open a Web browser and visit http://127.0.0.1:8000/ and you will see something similar to the one below
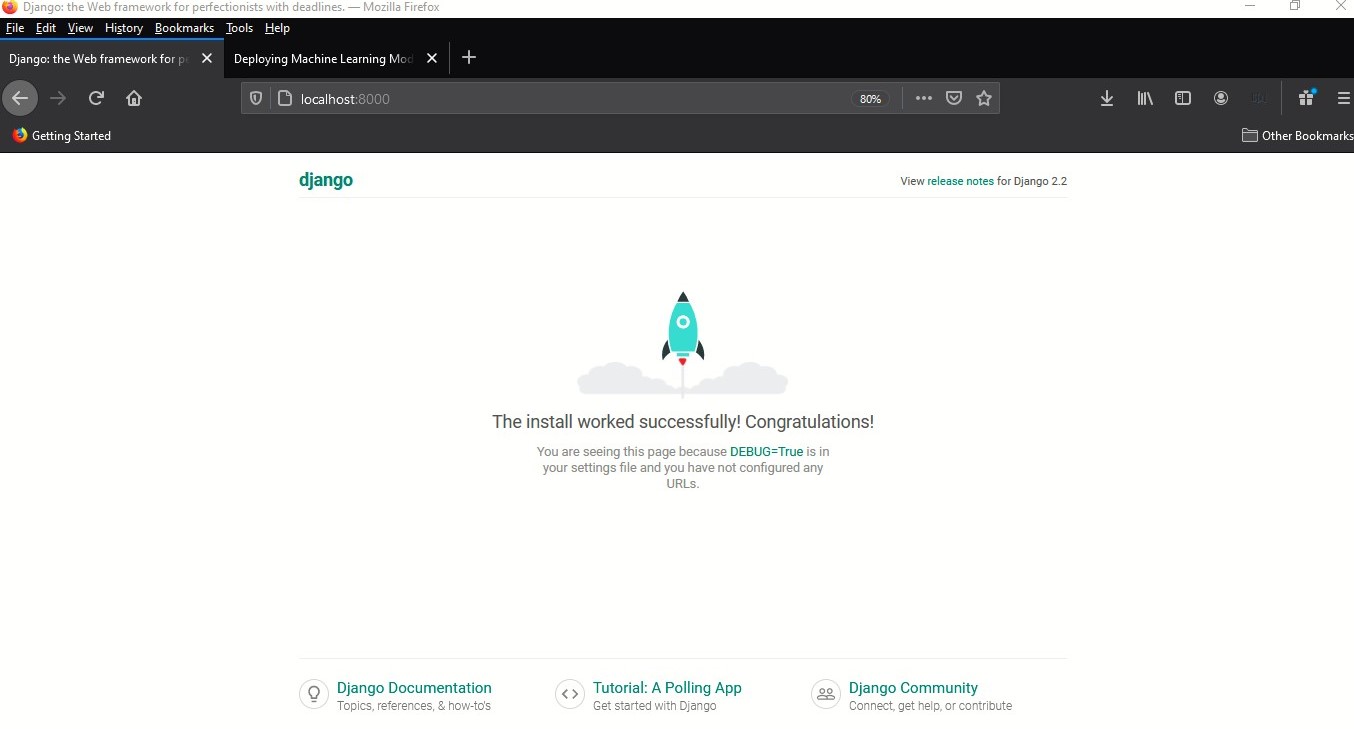
with everything working we are now set to create the iris app
Creating the iris app
An app is a Web application that does something. In our case the app will be predicting new instances of the iris species based on a user input. Let create the iris app by running the command:
$ python manage.py startapp iris
Managing Static Files
Websites generally need to serve additional files such as JavaScript files and CSS files. In Django these files are known as static files. These static files are import factor in web development and are used in designing the UI. Django provides django.contrib.staticfiles to help you manage them. In the outer ml_django/ root directory create a directory/folder named static which will contain all our static files. Your static folder should be similar to the one below depending on the sub-folders

For us to be able use these static files we need to edit the settings file, so in your settings file move to the bottom and define STATIC_URL to be
STATIC_URL = '/static/'
STATIC_URL is the base url of which the static files in the STATIC_ROOT are served
Create another folder in the outer ml_django/ root directory named static_dir and beneath STATIC_URL in the settings file define
STATIC_ROOT=os.path.join(BASE_DIR,"/static_dir")
We have set STATIC_ROOT to the static_dir directory and this is where we’d like to serve the static files when we run
$ python manage.py collectstatic
Let now define a list of directories (STATICFILES_DIRS) in the settings file where django will look for the static files
STATICFILES_DIRS=('static','C:/Users/USER/Music/ml_django/static')
where C:/Users/USER/Music/ml_django/static is the absolute path to the static directory containing the static files. From the command-line run
$ python manage.py collectstatic
to copy all files from your static folders into the STATIC_ROOT directory
The Model For The Iris App
Since the application will be accepting input from users, we need a database to store users inputs. The model is essentially our database layout, with additional metadata. Edit the iris/models.py file and add the following lines code to it
from django.db import models

# Create your models here.
class IrisData(models.Model):
    sepal_length= models.FloatField()
    sepal_width= models.FloatField()
    petal_length= models.FloatField()
    petal_width= models.FloatField()
    species= models.CharField(max_length=50)

    class Meta:
        db_table = 'IrisData'
        #managed = True
        verbose_name = 'data'
        verbose_name_plural = 'Data From Users'
which will define the models for the iris application.
Activating the Iris application
To keep track of our application and be able to create database tables for the model created above, we need to activate the iris app. To do so, edit the settings.py file and add under INSTALLED_APPS add ‘iris.apps.IrisConfig’
# Application definition

INSTALLED_APPS = [
     'iris.apps.IrisConfig',
    'django.contrib.admin',
    'django.contrib.auth',
    'django.contrib.contenttypes',
    'django.contrib.sessions',
    'django.contrib.messages',
    'django.contrib.staticfiles',
]
Since we’ve installed the iris application into our project let run
$ python manage.py makemigrations
which tells Django that we’ve made some changes to the models (in this case, we’ve create a new one) and that we’d like the changes to be stored as a migration and then run
$ python manage.py migrate
for it to run the migrations and manage the database schema automatically.
Django Admin Interface
iris/admin.py contains the configuration necessary to connect our iris app to the administration interface. Let’s add the model IrisData we created to the administration site and customize the way model is displayed by editing iris/admin.py as below:
 from django.contrib import admin
 from .models import IrisData
 # Register your models here.

 @admin.register(IrisData)

 class IrisDataAdmin(admin.ModelAdmin):
     list_display=('sepal_length','sepal_width','petal_length','petal_width','species')
For us to get access to the admin interface, we’ll need to create a user who can login to the admin site by Running the following command:
$ python manage.py createsuperuser
enter the desired username and press enter.
Username:
You will then be prompted for your desired email address:
Email address:
then
Password: **********
Password (again): *********
Superuser created successfully
Let run the development server again by running
$ python manage.py runserver
In your browser enter localhost:8000/admin
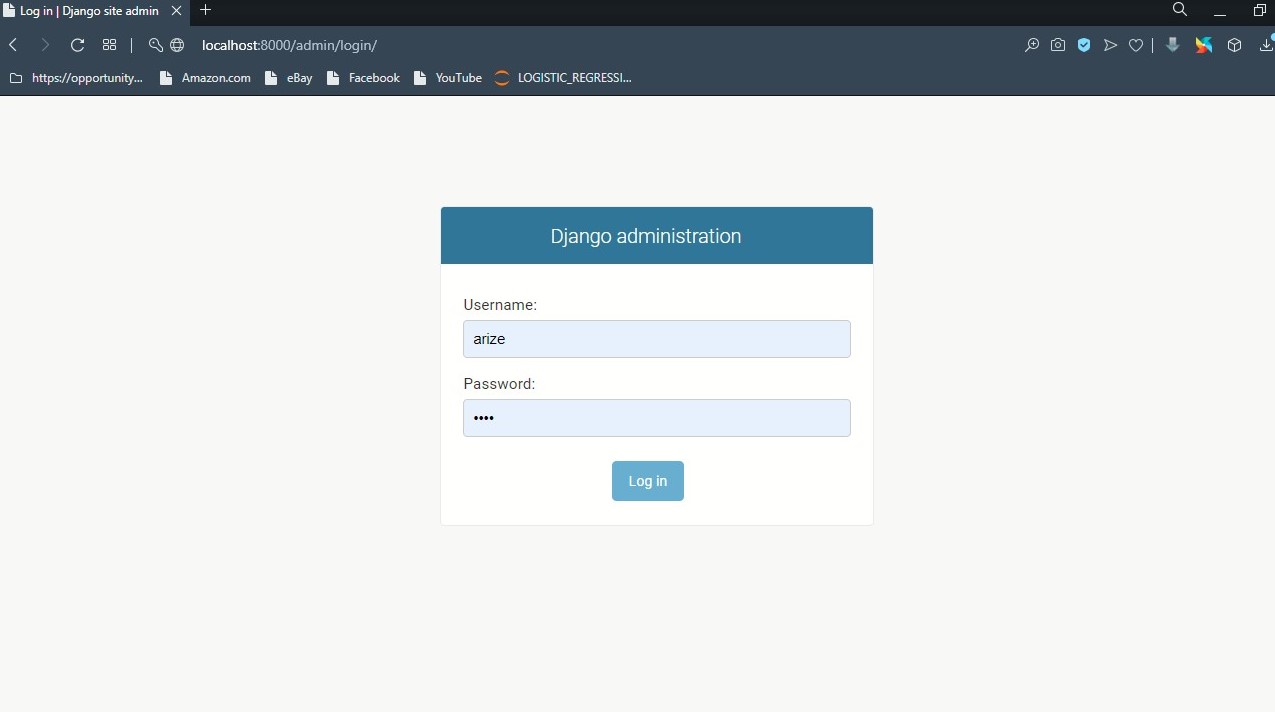
fill in your particulars to get access to the admin interface which should be like the figure below
Creating The Views Of The iris Application
In Django, web pages and other content are delivered by views. Each view is represented by a simple Python function (or method, in the case of class-based views). Django will choose a view base on the requested URL. So let’s first create our application views and define a URL pattern for these views.
Before creating the views, create a sub-directory named model which resides in the iris folder and copy the saved model into that folder (iris/models/iris_model.pkl). Let now create the views by editing the iris/views.py to have
from datetime import datetime
from django.shortcuts import render
from xgboost import XGBClassifier
import numpy as np
from xgboost import XGBClassifier
import joblib
import os
from .models import IrisData
import posixpath

BASE_DIR = os.path.dirname(os.path.dirname(os.path.abspath(__file__)))
# loading the saved model
model=joblib.load(os.path.join(BASE_DIR,'iris/models/iris_model.pkl'))
#,{'title':'Home Page','year':datetime.now().year,}
def home(request):
    return render(request,'iris/form.html')

def SpeciesPrediction(request):
    if request.method=='POST':

      # receive the values entered by the user

        sepal_l=request.POST['sepal_length']
        sepal_w=request.POST['sepal_width']
        petal_l=request.POST['petal_length']
        petal_w=request.POST['petal_width']

        """ saving the received data as a list according to the position of the features
        in the dataset used to train the model which can be known by calling iris_data.feature_names
        and is giving below as
         ['sepal length (cm)','sepal width (cm)','petal length (cm)','petal width (cm)']
          """

        data=[sepal_l,sepal_w,petal_l,petal_w]

        # converting the data into array
        data=np.array(data).reshape(-1,4)

        # the expected prediction by the model based on the user input

        result=model.predict(data)
        Species = ['Setosa', 'versicolor', 'virginica']
        result = Species[result[0]]

        # saving the data into the database

        save_data=IrisData(sepal_length=sepal_l,sepal_width=sepal_w,petal_width=petal_w,
                           petal_length=petal_l,species=result )
        save_data.save()
        context={"result":result}
        return render(request, 'iris/irispredict.html', context)
Defining A URL Patterns For The Iris Application Views
Let define the urls and map them to the views created so that when a user request a url Django runs through each URL pattern and stops at the first one that matches the requested URL. Django then import the view of the matching URL pattern and executes it. Let Define our urls by editing ml_django/urls.py
"""
Definition of urls for IrisPrediction.
"""

from datetime import datetime
from django.urls import path
from django.contrib import admin
from iris import  views


urlpatterns = [
    path('', views.home, name='home'),
    path('SpeciesPrediction',views.SpeciesPrediction,name='SpeciesPrediction'),
    path('admin/', admin.site.urls),
]
and finally, we will create the HTML files for the views created.
Templates Configuration
In Django, templates engines are configured under the TEMPLATES setting in the settings file so in the settings file under TEMPLATES set “DIRS” to
TEMPLATES = [
    {
        'DIRS': [os.path.join(BASE_DIR,'templates')],

       }
]
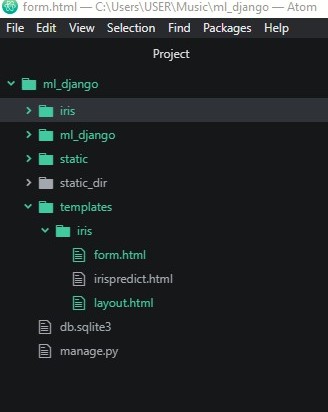
and in the outer ml_django/ root directory create a directory/folder named templates and then a sub-directory named iris. Within the iris sub-directory in the templates directory let create an HTML form name form.html that accept inputs from users and then send that information back to the server, an irispredict.html that render the result generated by the views and layout.thml to serve as the base layout for the project.Click on layout.html, form.html irispredict.html to copy the files to their respective files in the templates/iris folder. The templates directory should be similar to the figure below
After copy the html files, Let now test our application on new instance from users by running
python manage.py runserver
After running the command, open a Web browser and visit http://127.0.0.1:8000/ and you will see something similar to the one below
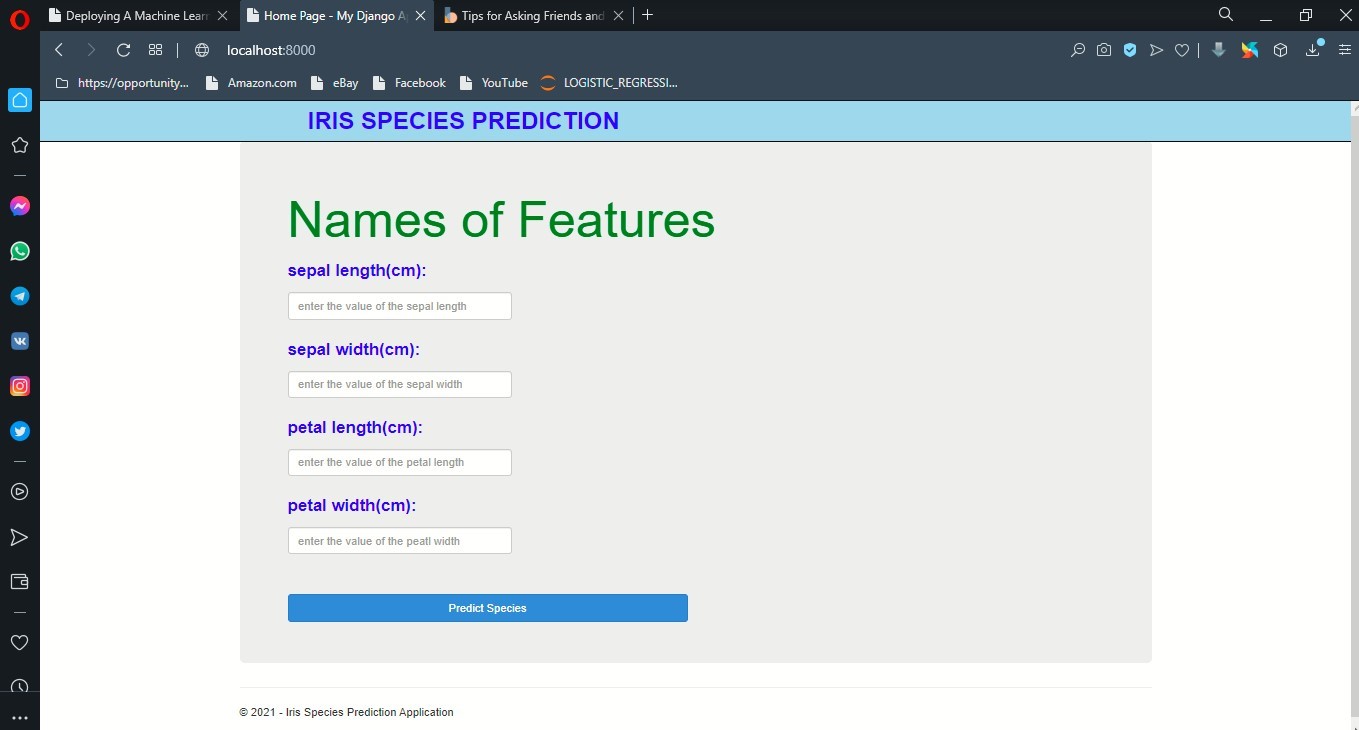
Now enter the values for the features
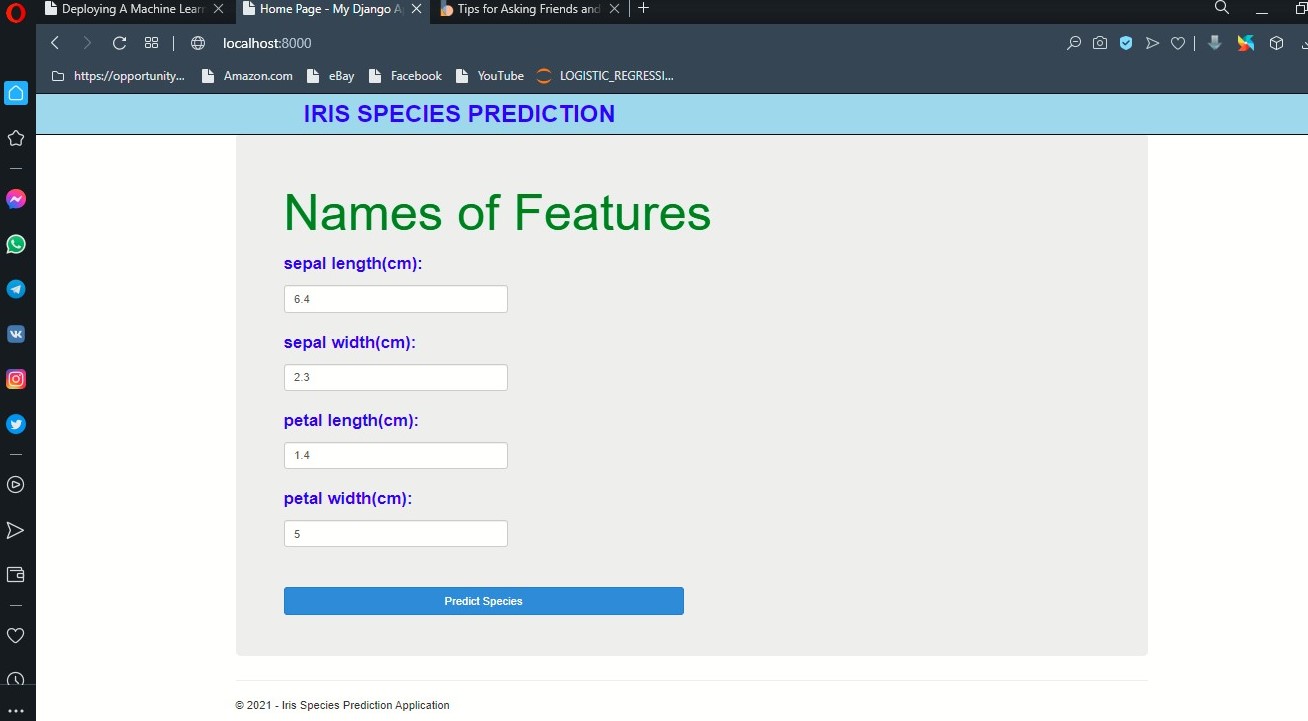
and click on Predict Species for the model to predict the species based on the values entered

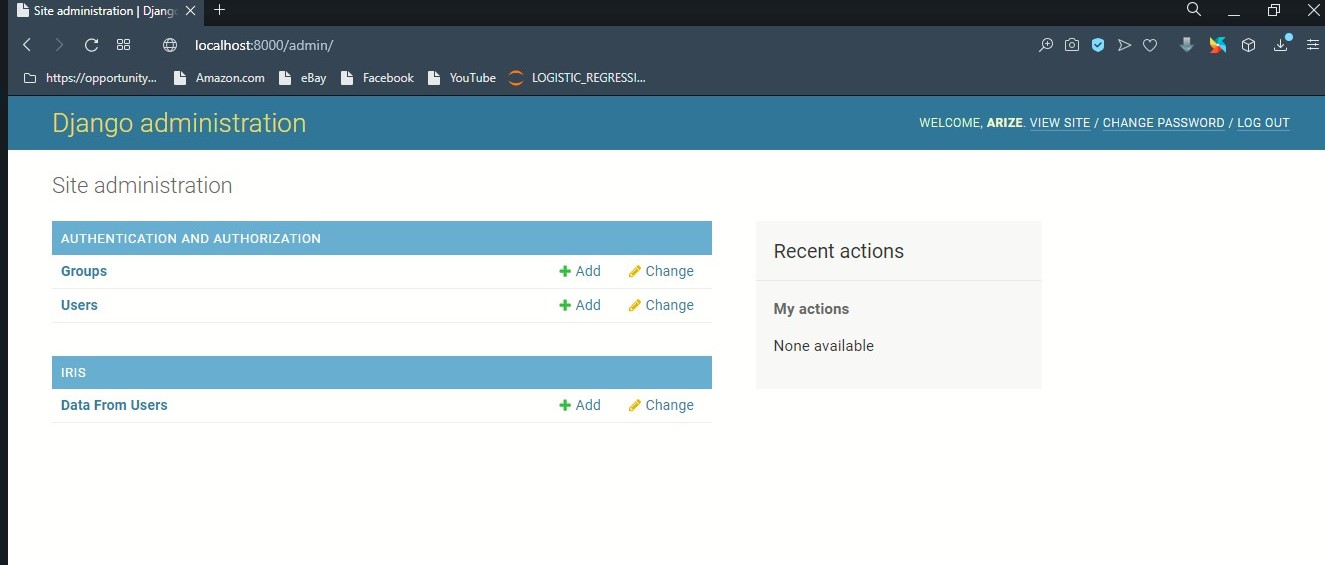
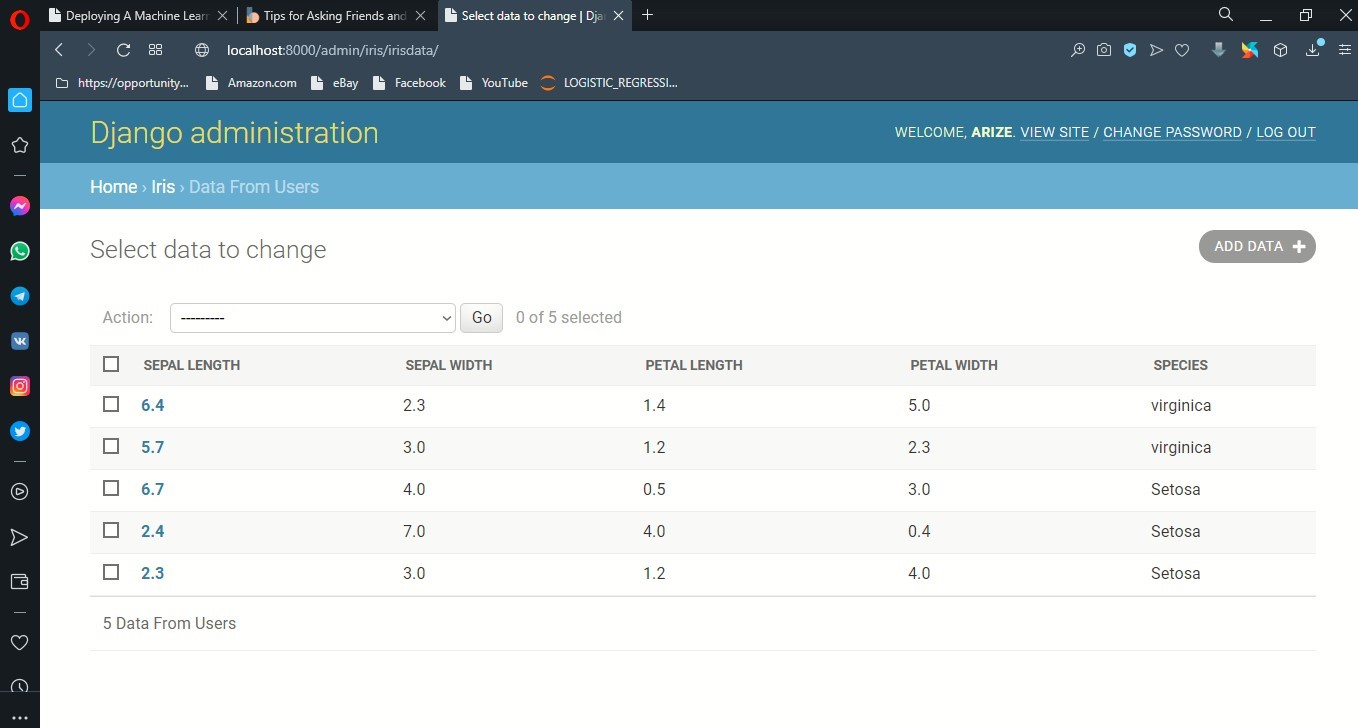
visit http://127.0.0.1:8000/admin to accesses the admin interface and then click on Data From Users to look at the saved data from users in the database
References: